在自绘编辑框中使用输入法
在输入法框架中,可以通过getController方法获取到InputMethodController实例来绑定输入法并监听输入法应用的各种操作,比如插入、删除、选择、光标移动等。这样就可以在自绘编辑框中使用输入法,并实现更加灵活和自由的编辑操作。
开发步骤
-
开发者在自绘编辑框中使用输入法时,首先需要在DevEco Studio工程中新建一个ets文件,命名为自定义控件的名称,本示例中命名为CustomInput,在文件中定义一个自定义控件,并从@kit.IMEKit中导入inputMethod。
import { inputMethod } from '@kit.IMEKit';@Componentexport struct CustomInput {build() {}} -
在控件中,使用Text组件作为自绘编辑框的文本显示组件,使用状态变量inputText作为Text组件要显示的内容。
import { BusinessError } from '@kit.BasicServicesKit';import { inputMethod } from '@kit.IMEKit';import Log from '../model/Log';const TAG = '[Submenu]';@Componentexport struct CustomInput {@State inputText: string = ''; // inputText作为Text组件要显示的内容private isAttach: boolean = false;private inputController: inputMethod.InputMethodController = inputMethod.getController();build() {Text(this.inputText) // Text组件作为自绘编辑框的文本显示组件。.fontSize(16).width('100%').lineHeight(40).id('customInput').height(45).border({ color: '#554455', radius: 30, width: 1 }).maxLines(1).onBlur(() => {this.off();}).onClick(() => {this.attachAndListener(); // 点击控件})} -
在控件中获取inputMethodController实例,先在文本点击时调用controller实例的attach方法绑定和拉起软键盘,再注册监听输入法插入文本、删除等方法。本示例仅展示插入、删除。
import { BusinessError } from '@kit.BasicServicesKit';import { inputMethod } from '@kit.IMEKit';import Log from '../model/Log';const TAG = '[Submenu]';@Componentexport struct CustomInput {@State inputText: string = ''; // inputText作为Text组件要显示的内容private isAttach: boolean = false;private inputController: inputMethod.InputMethodController = inputMethod.getController();build() {Text(this.inputText) // Text组件作为自绘编辑框的文本显示组件。.fontSize(16).width('100%').lineHeight(40).id('customInput').height(45).border({ color: '#554455', radius: 30, width: 1 }).maxLines(1).onBlur(() => {this.off();}).onClick(() => {this.attachAndListener(); // 点击控件})}async attachAndListener() { // 绑定和设置监听focusControl.requestFocus('customInput');try {await this.inputController.attach(true, {inputAttribute: {textInputType: inputMethod.TextInputType.TEXT,enterKeyType: inputMethod.EnterKeyType.SEARCH}});if (!this.isAttach) {this.inputController.on('insertText', (text) => {this.inputText += text;})this.inputController.on('deleteLeft', (length) => {this.inputText = this.inputText.substring(0, this.inputText.length - length);})this.isAttach = true;}} catch (err) {let error = err as BusinessError;Log.showError(TAG, `attach catch error: ${error.code} ${error.message}`);}}off() {this.isAttach = false;this.inputController.off('insertText');this.inputController.off('deleteLeft');}} -
在应用界面布局中引入该控件即可,此处假设使用界面为Index.ets和控件CustomInput.ets在同一目录下。
CustomInput()
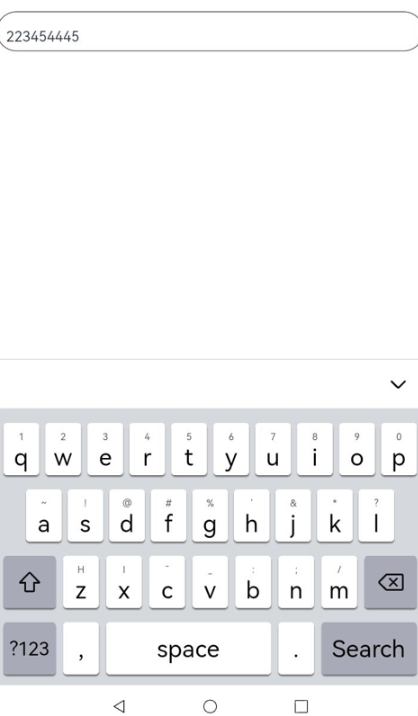
示例效果图